Please update your browser:

Your web browser Internet Explorer 11 is outdated and no longer supported.

The display of content and functionality is not guaranteed.

Themed image Spindle Service

Unique DMG MORI Gear Cutting Solutions …

… to increase your machine's production value

Utilize your machine’s full potential with DMG MORI technology cycles!

Overview

DMG MORI gearSKIVING 2.0

Themed image

UTILIZE YOUR MACHINE’S FULL POTENTIAL?

You might well know the problem. You get an enquiry for a range of components that, at first sight, are ideal for your machines. But the devil is in the detail. Special operations are needed, e. g. internal teeth which are difficult to produce. You now have to choose whether to turn down the order or outsource. However, this can be avoided by using our exclusive DMG MORI technology cycles. On the following pages, you will find out how to overcome these challenges, and increase productivity with a simple software upgrade.

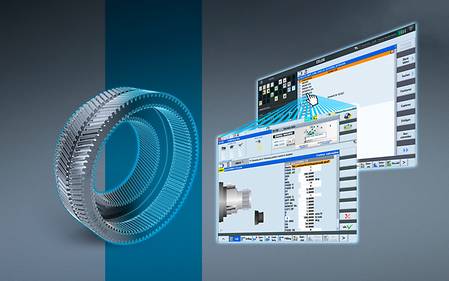
FASTER: thanks to menu-guided entry of gear parameters
SIMPLE: Automatic calculation of NC program based on gear parameters
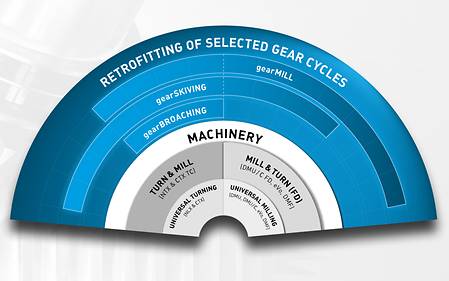
RETROFITTABLE: Pure software solution – integration in new and existing machines*

*Retrofittability of gearBROACHING and gearSKIVING depending on the control version

UNIQUE DMG MORI GEAR CUTTING SOLUTIONS

CONVERSATIONAL PROGRAMMING IS 60 % FASTER

The exclusive DMG MORI Technology Cycles are intuitive self-guided systems for shopfloor programming that boost productivity and safety, as well as enhancing your machines' capabilities.

  • Clear programming structure
  • Up to 60 % faster programming
  • Error reduction thanks to conversational  programming
  • New technologies (gear-cutting, grinding)
  • Technology know-how saved in the program

55 DMG MORI TECHNOLOGY  CYCLES

COMPLEX MACHINING  IMPLEMENTED WITH EASE
Themed image
  • 23 MACHINING CYCLES
    e. g. new machining processes and  enhanced machine capability such as  gear machining
  • 15 HANDLING CYCLES
    e. g. simplification of machine operation  and automated sequences
  • 9 MEASURING CYCLES
    e. g. increased machining accuracy  and transparency of QA processes
  • 8 MONITORING CYCLES
    e. g. increased machine safety and  process reliability


GEAR CUTTING SOLUTIONS

Themed image

INTERNAL & EXTERNAL GEARS
ø 3,200mm MAX. DIAMETER

SPUR GEARS

  • Spur, helical and  double-helical gears  
  • Segments

BEVEL GEARS

  • Spur, helical, spiral and hypoid gears              
  • Axis angles other than 90
  • Klingelnberg Zyklo-Palloid®
  • Gleason

WORM GEARS

  • Profile ZA
  • Profile ZN
  • Profile ZI
Gear cutting technology cycles for Mill & Turn and Turn & Mill machines
gearSKIVING - up to 8 times faster than broaching
Gear cutting technology cycles for Mill & Turn and Turn & Mill machines
Themed image ULTRASONIC main
  • Gear cutting on 5-axis milling, mill-turn and turn-mill machines: External & internal gear cutting up to Ø 3,200 mm and gear quality > 5"
  • Maximum flexibility: Demand-driven utilization of machines for gear cutting operations, as a supplement to milling and/or turning operations.
  • Fast: Through conversational input of the gear parameters
  • Simple: Automatic calculation of the NC program based on the gear parameters
  • Retrofittable: A pure software solution - integration into new and existing machines
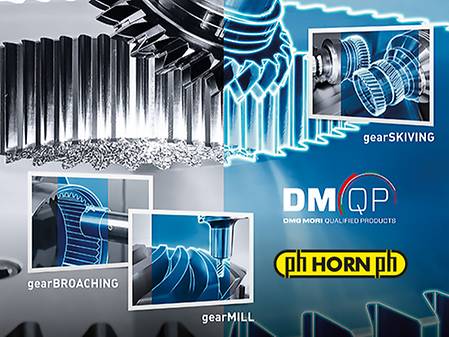
  • DMQP: Always the optimal tools from our cooperation partners
gearSKIVING - up to 8 times faster than broaching
Themed image ULTRASONIC highlight 1
  • Gearskiving of internal and external gears up to MODULE 11
  • Straight and helical external or internal spur gears and splines, internal gears possible without an angle head
  • Synchronization and tool path controlled by cycle
  • Available for machines with SIEMENS / CELOS with SIEMENS and MAPPS / CELOS with MAPPS
  • TURN & MILL and DMF 
    • Herringbone gears with tooth offset
    • Crowned gears by mathematical transformation of the 6th virtual axis on TC & DMF machines


Gear cutting technology cycles for Mill & Turn and Turn & Mill machines
Themed image ULTRASONIC highlight 2
  • Gear cutting with standard tools ≥ MODULE 3
  • Program generation based on blank drawings or gear data, contact pattern individually modifiable
  • Postprocessor for SIEMENS, HEIDENHAIN and MAPPS
  • Spur gears, bevel gears and worm gears
  • Interface for coordinate measuring machines (Klingelnberg, Leitz, Zeiss)
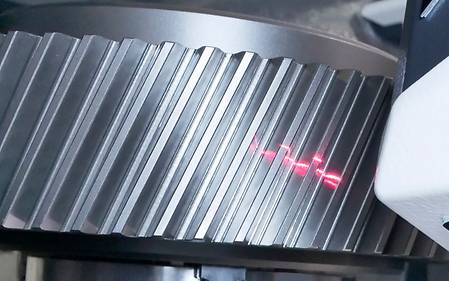
  • In-process measuring: Tactile via touch probe and optical via laser scanner, accuracy comparable to a coordinate measuring machine


Measurement

OPTICAL ON-MACHINE MEASUREMENT

Non contact profile measurement by laser scanning probe          

  • 70,000 scan points per second
  • Enable to evaluate free form surface

Reduced number of processes & time

  • 6 steps instead of 10 and > 50 % reduced process time       
  • Machining & measurement in a single set-up

Same accuracy as CMM

  • More than 80% measuring points within ± 2 µm
  • Improvement of machining accuracy

Gear measurement & evaluation

  • Professional solution easy to use for every operator

EXAMPLE: HELICAL GEAR

Themed image

ø 300 mm // 73 Teeth


CMM

OPTIC


40 min

13 min

Alignment   

20 min (manual)           

3 min (automatic)

4 Teeth   

7 min (6 lines)

4 min (whole flank)

Index Error    

13 min

6 min

> 50% reduced process time

CUSTOMER VOICES & VIDEOS

[{"filter":"fq=(newsroom:true AND documenttype:SocialNetworkPost) OR documenttype:(AVNewsChannel OR S4MYoutubeVideo OR S4MExternalVideo OR CMDownload) OR informationType_0_taxIdsLevel: 46914 OR (documenttype:AVEvent AND issueDate:[NOW/DAY TO NOW/DAY%2B30DAY])","key":"all"},{"filter":"fq=(documenttype:(S4MYoutubeVideo OR S4MExternalVideo) AND subject_taxIdsTree:627588)","key":"videos"},{"filter":"fq=(documenttype:AVNewsChannel AND subject_taxIdsTree:627588)","key":"sucess_stories"},{"filter":"fq=(documenttype:AVEvent AND subject_taxIdsTree:627588)","key":"events"}]